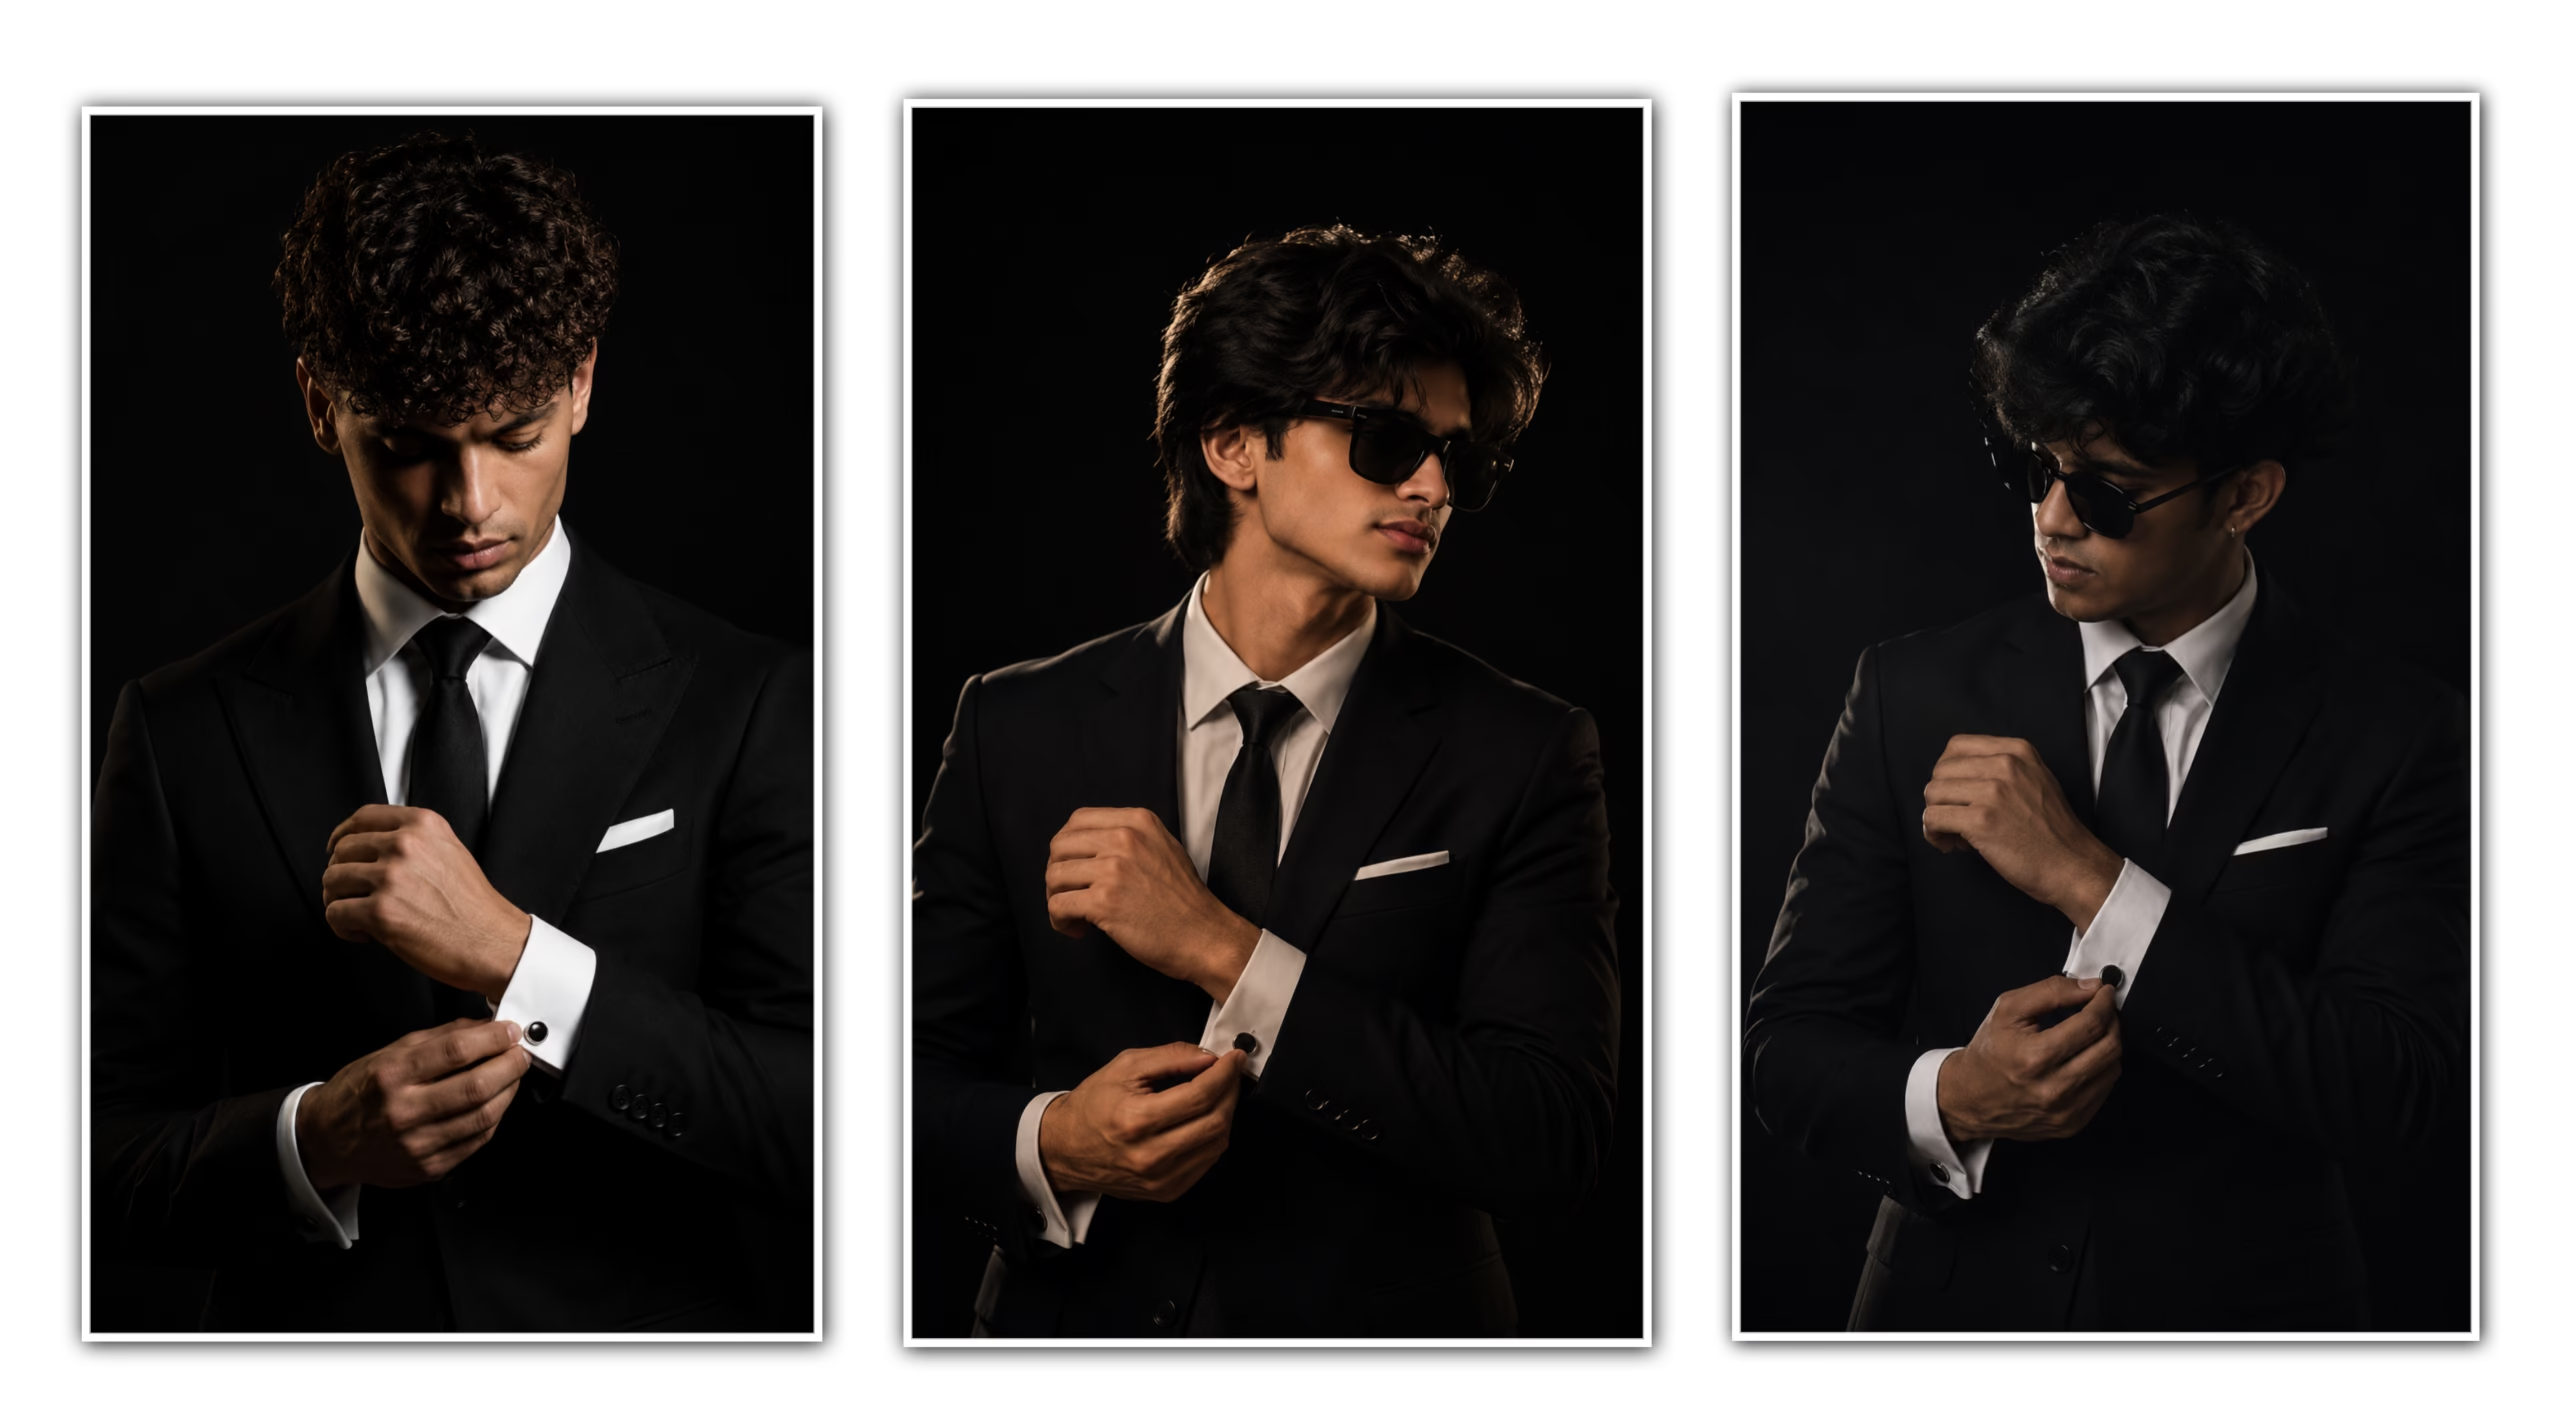
In this case, the image could look stylish, authoritative and professional wearing a black suit, but the proper editing will make all the difference. While an ordinary image of the suit can easily turn out to be a cinematic portrait with the right light, contrast, colors, background, and mood among others.
The ”Black Suit Cinematic Portrait Edit” is one of the most famous types of editing for profile images, Instagram posts, professional portfolios, fashion images, wedding portraits and branding on social media. In this case, the image is not just made dark but rather edited to bring out a cinematic effect while retaining the naturalness of the face and the black suit.
In this article, you will learn how to perform this task.
What Is a Black Suit Cinematic Portrait Edit?
“Black Suit Cinematic Portrait Edit” is a type of portrait edit that involves the use of a black, formal wear alongside dramatic lighting, contrast, shadowing, and also a cinematic color grading.
The black suit in most cases retains its texture rather than being a total flat black color. Adequate light is shone on the face making it the focal point of the photo.
A successful edit normally includes:
- Improved exposure
- Controlled highlights
- Deeper shadows
- Detailed black clothing
- Natural skin tones
- Cinematic color grading
- Background separation
- Subtle sharpening
- Professional cropping
- Controlled vignetting
The most important principle is balance. The image should look dramatic without making the face too dark or the suit completely lose its texture.
Why Black Suit Portraits Look Cinematic
Black clothing naturally creates strong contrast against skin and lighter backgrounds. This makes it easier to create a dramatic portrait.
Cinematic photography often uses a combination of:
Dark shadows + controlled highlights + strong subject separation + subtle color grading
For example, if the background is slightly darker than the face, the viewer’s attention naturally moves toward the subject.
However, simply increasing contrast is not enough. Excessive contrast can remove details from the suit and create unnatural skin tones.
Step 1: Choose the Right Original Photo
The quality of the original photograph determines how good the final edit can become.
Choose a photo with:
- Good facial visibility
- Sharp facial details
- Reasonable exposure
- Clear suit texture
- A simple or controllable background
- Minimal motion blur
- Natural skin tones
A photo with strong facial details gives you more flexibility when adjusting exposure and colors.
Avoid heavily compressed images whenever possible. High-resolution photographs retain more information in the shadows and highlights.
Step 2: Correct the Exposure
Start the edit by correcting the basic exposure.
Do not immediately make the photograph extremely dark. First, make sure the face is properly exposed.
A useful starting approach is:
- Exposure: Adjust according to the original image
- Highlights: Reduce if the face or background is too bright
- Shadows: Slightly reduce for depth
- Whites: Control carefully
- Blacks: Lower moderately
- Contrast: Increase gradually
The exact values depend on the original photograph, so avoid using the same settings for every image.
The face should remain clearly visible even after creating a dark cinematic atmosphere.
Step 3: Preserve Details in the Black Suit
This is one of the most important parts of the edit.
A black suit should look black, but it should still contain visible folds, edges, buttons, and fabric texture.
If you reduce the blacks too aggressively, the suit can become a featureless dark shape.
Instead:
- Lower the overall exposure slightly.
- Increase contrast carefully.
- Adjust the black point gradually.
- Recover shadow details when necessary.
- Use local adjustments on the suit if required.
Zoom into the jacket while editing. Check whether the fabric texture is still visible.
The goal is deep black with detail, not pure crushed black.
Step 4: Improve the Skin Tone
The face is normally the most important part of a portrait.
Avoid excessive skin smoothing because cinematic portraits still need realistic skin texture.
Use subtle adjustments to:
- Correct unwanted color casts
- Balance skin brightness
- Reduce excessive redness or yellow tones
- Improve facial contrast
- Maintain natural texture
If the face becomes orange after color grading, reduce the warmth or saturation instead of applying heavy skin retouching.
Natural skin usually looks more professional than an overly processed face.
Step 5: Create Background Separation
A cinematic portrait becomes stronger when the subject separates clearly from the background.
There are several ways to achieve this:

Darken the Background
Reduce the exposure or brightness of the background slightly while keeping the face brighter.
Add Blur
A subtle background blur can create depth, especially when the original photograph has a suitable composition.
Use a Mask
Selective masking allows you to edit the subject and background independently.
Add a Light Gradient
A subtle light behind or around the subject can create separation without making the image look artificial.
The background should support the subject rather than compete with it.
Step 6: Apply Cinematic Color Grading
Color grading gives the portrait its final mood.
A popular cinematic approach is to keep skin tones relatively warm while introducing slightly cooler tones into the shadows.
This creates color contrast without changing the entire image.
You can experiment with:
- Slightly warm highlights
- Cooler shadows
- Reduced overall saturation
- Controlled green tones
- Subtle blue tones in darker areas
Do not push the colors too far. Cinematic does not mean heavily colored.
A professional portrait usually benefits from a restrained color palette.
Step 7: Add Controlled Contrast
Contrast helps define the suit, face, hair, and background.
Instead of simply increasing the global contrast slider, consider using a tone curve.
A subtle S-curve can create:
- Slightly deeper shadows
- Brighter highlights
- Better midtone separation
Be careful with the darkest areas because excessive contrast can destroy information in black clothing.
Check the image at both full size and thumbnail size. The face should remain immediately visible.
Step 8: Enhance Facial Lighting
If the face needs more attention, use a soft local adjustment.
Brighten areas such as:
- Forehead
- Cheekbones
- Nose bridge
- Eyes
- Jawline
The adjustment should be subtle.
Another useful technique is to slightly darken areas around the face. This creates a natural visual spotlight.
Avoid creating an obvious white glow around the subject.
Step 9: Add a Subtle Vignette
A vignette can help direct attention toward the center of the portrait.
Use a soft vignette rather than a strong black border.
The corners should become slightly darker while the central subject remains naturally illuminated.
If viewers immediately notice the vignette instead of the person, it is too strong.
Step 10: Sharpen the Important Details
Sharpening can make a final portrait look cleaner, especially after resizing.
Focus sharpening on:
- Eyes
- Hair
- Suit edges
- Facial details
- Accessories
Avoid excessive sharpening on skin because it can emphasize unwanted texture.
If your editing application supports masking during sharpening, use it to protect smoother areas of the face.
Step 11: Use Local Adjustments for a Professional Finish
Global adjustments affect the entire image, but professional portrait editing often requires selective adjustments.
For example:
Face: Slightly brighter and warmer
Suit: Deeper blacks with retained texture
Background: Slightly darker and softer

Hair: Controlled highlights
Eyes: Very subtle brightness and sharpness
Edges: Slightly darker to improve focus
This selective workflow gives you much more control than applying one filter to the entire photograph.
Step 12: Check the Image Before Exporting
Before saving the final portrait, inspect it carefully.
Ask yourself:
- Is the face clearly visible?
- Does the suit still contain texture?
- Are the skin tones natural?
- Is the background distracting?
- Are the shadows too dark?
- Are the highlights blown out?
- Does the image look cinematic rather than simply dark?
- Is the subject properly positioned?
If the answer to these questions is yes, the edit is likely ready.
Common Mistakes to Avoid
Making Everything Too Dark
A cinematic portrait should have dark areas, but the entire image should not be underexposed.
Crushing the Blacks
This removes texture from the black suit and makes it look flat.
Over-Smoothing the Skin
Excessive skin retouching can make a realistic portrait look artificial.
Using Too Much Saturation
Strong colors can destroy the sophisticated mood of a black suit portrait.
Overusing Blur
Heavy background blur can make the edit look unrealistic.
Excessive Sharpening
Too much sharpening creates harsh edges and unnatural skin texture.
Strong Vignettes
A heavy vignette can make the image look dated rather than cinematic.
Recommended Editing Workflow
For consistent results, follow this order:
Crop → Exposure → Contrast → Highlights/Shadows → Black Suit Details → Skin Tone → Background → Color Grade → Local Lighting → Vignette → Sharpening → Export
Following a consistent workflow makes editing faster and reduces unnecessary adjustments.
Best Export Settings
For social media, export the final image according to the platform’s recommended dimensions.
For a vertical portrait, a 4:5 composition works well for many social-media feeds, while 9:16 is useful for Stories and short-form video platforms.
For general photo sharing:
- Use JPEG for smaller file sizes.
- Use high-quality export settings.
- Keep the original high-resolution version separately.
- Avoid repeatedly saving and recompressing the same JPEG.
If the image will be used for printing or further editing, retain a high-quality master file.
Final Tips for a Premium Black Suit Portrait
The best Black Suit Cinematic Portrait edits are usually created through small, controlled adjustments rather than extreme filters.
Focus on five important elements:
1. Face: Keep it bright enough and natural.
2. Suit: Maintain deep blacks while preserving fabric detail.
3. Background: Keep it simple and slightly separated from the subject.
4. Color: Use a restrained cinematic color palette.
5. Lighting: Create depth with controlled highlights and shadows.
Remember, every picture is unique. The environment that creates the best photo for one picture will create an overly dark, warm, or contrasty photo for another photo.
The objective of cinematic editing is to emphasize the positive aspects of the photo rather than using too many filters to hide them.
A good photo and an effective editing process will transform your plain black suit photo into a cinematic photo that is fit for your Instagram page, profile, portfolio, and projects.