Red Aura Cinematic Photo Edit: 2026 Trending Style
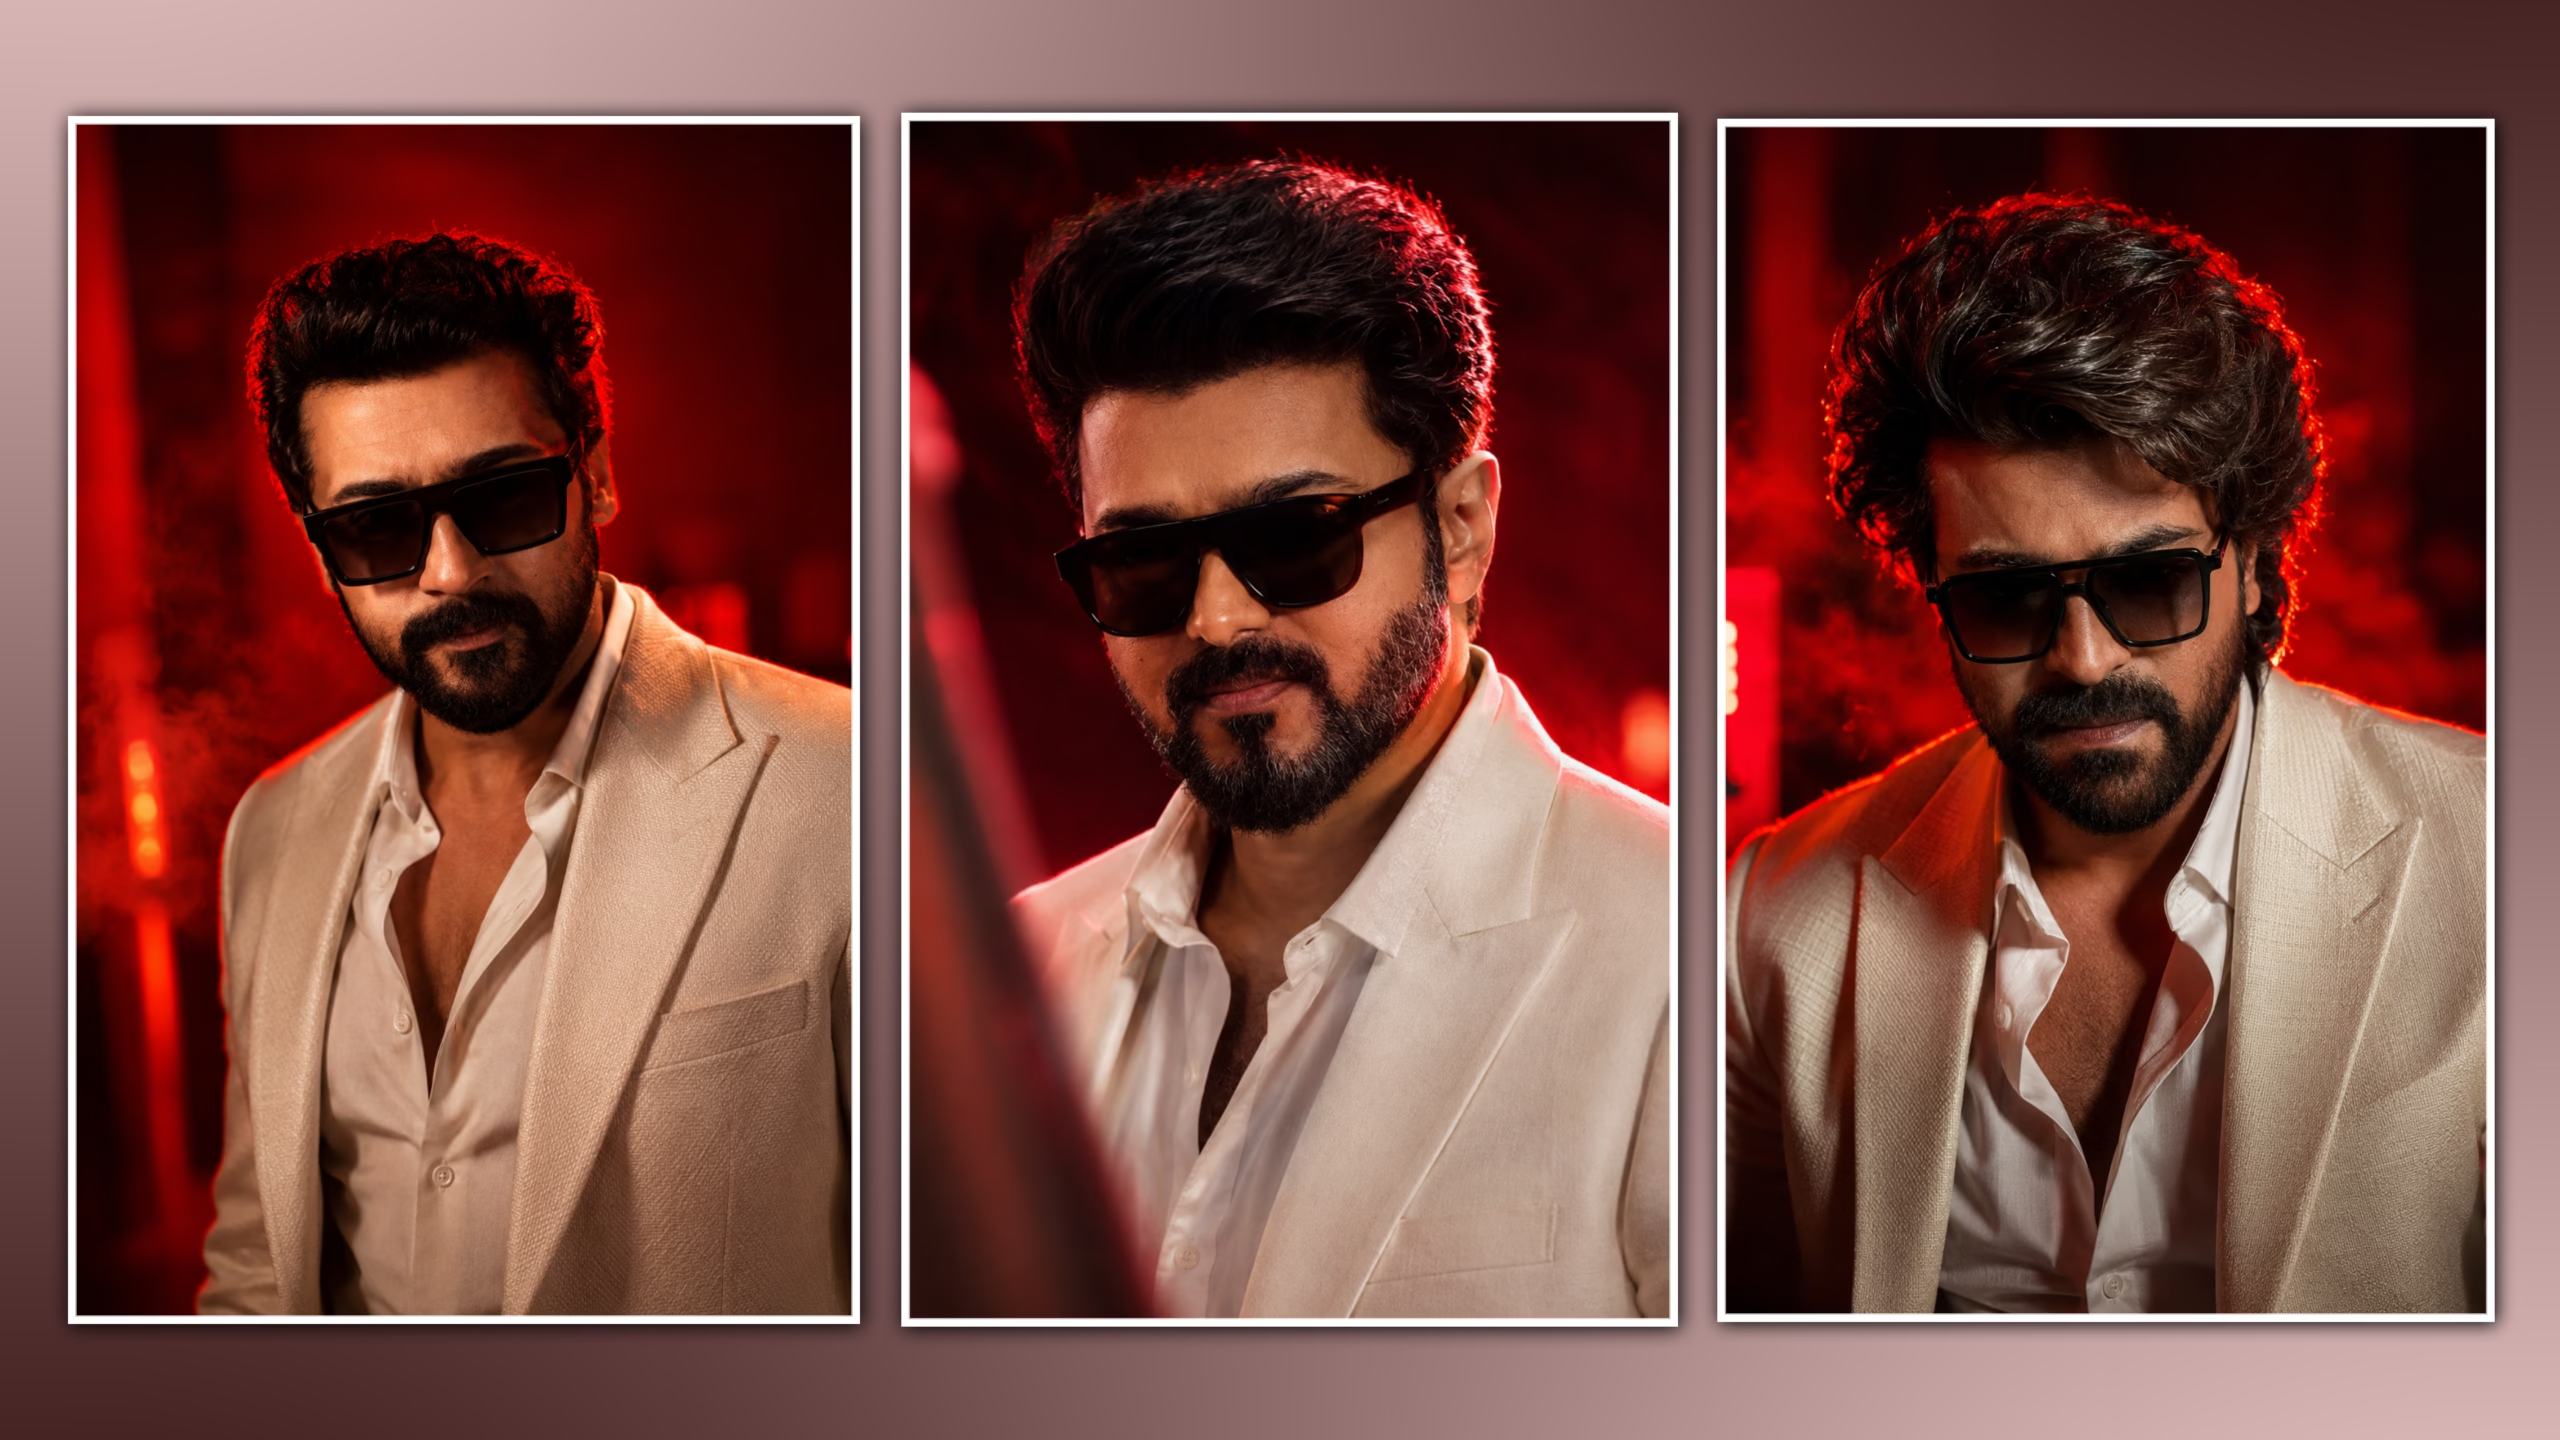
A red aura cinematic photo edit combines deep red lighting, controlled glow, contrast, shadows, and atmospheric effects to create a dramatic portrait. This style works well for Instagram posts, Reel covers, profile photos, fashion portraits, and cinematic social media visuals.
The effect is not simply a red filter. A convincing result depends on controlling light direction, skin tones, background separation, glow intensity, contrast, and color balance.
You can create this effect on a phone using most modern photo-editing apps. The exact tools may vary, but the editing principles remain the same.
1. Choose the Right Photo
The original image has a major effect on the final result.
Choose a photo with:
- Clear facial details
- Good exposure
- Natural skin texture
- Moderate or high resolution
- Visible subject-background separation
- Enough space for cropping
- Directional lighting when possible
Portraits with dark or neutral backgrounds usually work particularly well because the red lighting creates stronger contrast.
Best source image → cleaner lighting → more realistic final edit
Avoid blurry or heavily compressed images. Glow and sharpening cannot restore missing image detail.
2. Correct the Base Image First
Do not start by adding the red aura.
First correct the original photograph using exposure, contrast, highlights, shadows, and saturation.
Starting Adjustment Values
| Adjustment | Starting Range |
|---|---|
| Exposure | -0.1 to +0.2 |
| Contrast | +10 to +20 |
| Highlights | -15 to -30 |
| Shadows | -5 to +15 |
| Saturation | -5 to +8 |
| Clarity/Structure | +5 to +12 |
| Sharpening | +3 to +8 |
These are starting points rather than fixed settings.
Correct exposure first, then contrast, and only afterward begin the creative color treatment.
3. Build the Red Color Treatment
Introduce the main red tone using your app’s color grading, HSL, curves, selective color, or overlay tools.
The goal is to make red the dominant atmospheric color without turning the entire photograph red.
A useful approach is:
Shadows → slightly red or magenta
Highlights → neutral or slightly warm
Skin → mostly natural
Background → deeper red or dark neutral
Starting Red Strength
15–30%
If the subject’s face becomes strongly red, reduce the effect or mask it from the skin.
4. Create the Red Aura
The aura is the main visual feature of this style.
Instead of applying red across the entire image, create a soft red light source behind or around the subject.
Useful methods include:
- Soft red gradient
- Radial light
- Red glow
- Blurred red layer
- Light leak
- Soft brush
Place the strongest red light near the outer edges of the subject rather than directly over the face.
Aura Opacity
10–25% for a subtle look
25–35% for a stronger cinematic look
Keep the center of the face relatively clean.
The viewer should notice the person first and the aura second.
5. Separate the Subject From the Background
A red aura becomes more effective when the background is slightly darker than the subject.
Use masking, selective exposure, background blur, shadows, or a subtle vignette to reduce background brightness.
The basic target is:
Subject brightness > Background brightness
Vignette Starting Point
-10 to -20
Avoid making the corners completely black. Keep enough background detail to support the composition.

6. Add Red Rim Light
A narrow red highlight around the subject can make the lighting feel more realistic.
Apply the red light mainly to:
- Hair edges
- Shoulders
- Jacket edges
- Side of the face
- Clothing outline
Rim-Light Opacity
15–30%
The light should follow the direction of the imaginary red light source. Avoid outlining every part of the subject equally.
7. Protect Natural Skin Tones
This is one of the most important parts of the edit.
A common mistake is allowing the red grading to affect the entire face.
If your app supports masking or HSL controls, selectively reduce red intensity on the skin.
A useful balance is:
Background → Strong red
Clothing → Moderate red
Skin → Low red
Eyes and important facial details → Natural
This keeps the atmosphere dramatic while preserving a believable portrait.
8. Add Controlled Glow
Use glow to connect the red lighting with the rest of the image.
Apply it mainly around:
- Red light sources
- Hair edges
- Background lights
- Clothing highlights
- Rim-light areas
Glow Starting Point
10–20% opacity
For a stronger effect:
20–30%
Avoid applying strong glow to the complete photograph.
9. Refine the Cinematic Contrast
After establishing the red lighting, refine the contrast.
Aim for three visual levels:
Bright subject details → Midtone skin/clothing → Dark background
Use curves or contrast adjustments to deepen shadows while protecting important facial highlights.
Do not crush the shadows so much that hair, clothing, or background details disappear.
10. Add Atmospheric Effects Sparingly
Optional effects can add depth:
- Red particles
- Dust
- Soft smoke
- Light streaks
- Bokeh
- Subtle lens flare
Effect Opacity
5–15%
Use fewer effects instead of stacking everything together.
Red aura + subtle particles + controlled glow
is usually cleaner than using multiple strong overlays.
The subject should remain visually dominant.
11. Create Depth With Background Blur
If the background competes with the subject, apply a small amount of blur.
Keep the subject sharp while making the background progressively softer.
Subject → Sharp
Near background → Slightly soft
Far background → More blurred
Use this only when the original background needs additional separation.

12. Use Sharpening at the End
Sharpening should be one of the final adjustments.
Starting Value
+3 to +8
Focus sharpening on:
- Eyes
- Hair
- Clothing details
- Important facial features
Avoid excessive sharpening because strong red contrast and glow can make skin texture look unnatural.
If the photograph contains noise, reduce the noise before applying final sharpening.
13. Recommended Editing Order
For a repeatable workflow:
Original photo
↓
Exposure correction
↓
Contrast adjustment
↓
Background separation
↓
Red color grading
↓
Red aura
↓
Rim light
↓
Skin-tone correction
↓
Glow
↓
Atmospheric effects
↓
Vignette
↓
Sharpening
↓
Final quality check
Following this order prevents creative effects from hiding problems in the original image.
14. Red Aura Settings Cheat Sheet
Use these as starting values and adjust according to the photograph.
| Effect | Starting Value |
|---|---|
| Contrast | +10 to +20 |
| Highlights | -15 to -30 |
| Shadows | -5 to +15 |
| Saturation | -5 to +8 |
| Red color strength | 15–30% |
| Aura opacity | 10–25% |
| Rim light opacity | 15–30% |
| Glow opacity | 10–20% |
| Particles | 5–15% |
| Vignette | -10 to -20 |
| Sharpening | +3 to +8 |
Best practice: Make small adjustments and inspect the complete image after each major change.
15. Common Red Aura Editing Mistakes
Making Everything Red
This removes color separation and makes the image look flat.
Fix: Keep the background red while protecting skin and important highlights.
Using Excessive Glow
Strong glow destroys fine details.
Fix: Start around 10–20% and increase only when necessary.
Making the Background Too Bright
This reduces subject separation.
Fix: Keep the background darker and position the strongest red light behind or beside the subject.
Over-Sharpening
High sharpening combined with strong contrast can create harsh skin texture.
Fix: Keep sharpening subtle.
Adding Too Many Effects
Multiple overlays can quickly make the edit look artificial.
Fix: Use one primary effect and one or two supporting effects.
Ignoring Light Direction
A red glow coming from the wrong direction can look unrealistic.
Fix: Match the aura and rim light to the existing or imagined light direction.
16. Final Quality Check
Before exporting, check these five things:
- Face and important details are clear
- Skin tone remains reasonably natural
- Red aura is visible without dominating
- Background remains darker than the subject
- Glow, particles, and rim light look subtle and realistic
If removing an effect makes the image look better, reduce that effect.
17. Export the Final Photo
Use a high-quality export suitable for the platform.
| Use | Recommended Size |
|---|---|
| Instagram Portrait | 1080 × 1350 px |
| Square Post | 1080 × 1080 px |
| Vertical Reel Cover | 1080 × 1920 px |
Use a high-quality JPEG or PNG depending on your workflow and platform requirements.
Final Takeaway
A good Red Aura Cinematic Photo Edit can be made using lighting and colors, but not through simply putting a red filter on top of the whole picture.
Use an excellent portrait, adjust the exposure, separate the background from the picture, add reds, create a soft aura behind the person, add rim light, ensure skin colors are preserved, and use glow.
Make the red light feel like it belongs in the photograph.
When the lighting direction, color intensity, subject separation, and effects work together, the result looks cinematic instead of heavily filtered.

PROMPT LINK